Monday, May 26, 2014

VivaLasVegaStamps! Blog Hop

Mixed Media Blog Hop 


 Welcome to the IMAGINE Crafts and Viva Las VegaStamps! Blog Hop.  For the next week, our two design teams will be featuring some amazing projects featuring products from both our companies.   Amazing stamps require amazing ink, right?

Mixed Media Prize Package

We're proud to announce your chance to win one of three different Mixed Media Prize Packages from IMAGINE Crafts and Viva Las VegaStamps!  You have until midnight PST on Sunday, May 31st 2014  to comment on as many of the Design Team Blog Posts from this week as possible. On Monday, June 1st  we’ll draw three random blog posts and one comment from each of those posts will win a prize package!

Ready for some inspiration from our artists?

Here's today's posts from IMAGINE Crafts:

And from Viva Las VegaStamps!:

  If you're just joining us on the Mixed Media Blog Hop, here' the links to the previous days posts: Saturday, Sunday   ***Blog Hop Hint – if you click on a link that takes you to a page saying something like, “Sorry this page cannot be found” just click on the header at the top of the blog (usually a picture or the blog’s name) and it will take you to that blog’s most recent post. That post *should* be our hop. If not, you can probably scroll down a short way to find the hop post.
VivaLasVegaStamps!  Have you ever been there?  As the name telling they are at Las Vegas near Strip.  They don't have slot machine, but RED RUBBERS! plenty of them!!  As soon as opening the doore you'll know you are in the heaven by rubber smell, LOL.

I was so excited that my next assignment is VLVS! blog hop since I've been big fun of this manufacture, also they have been making new images in addition to their million of them.

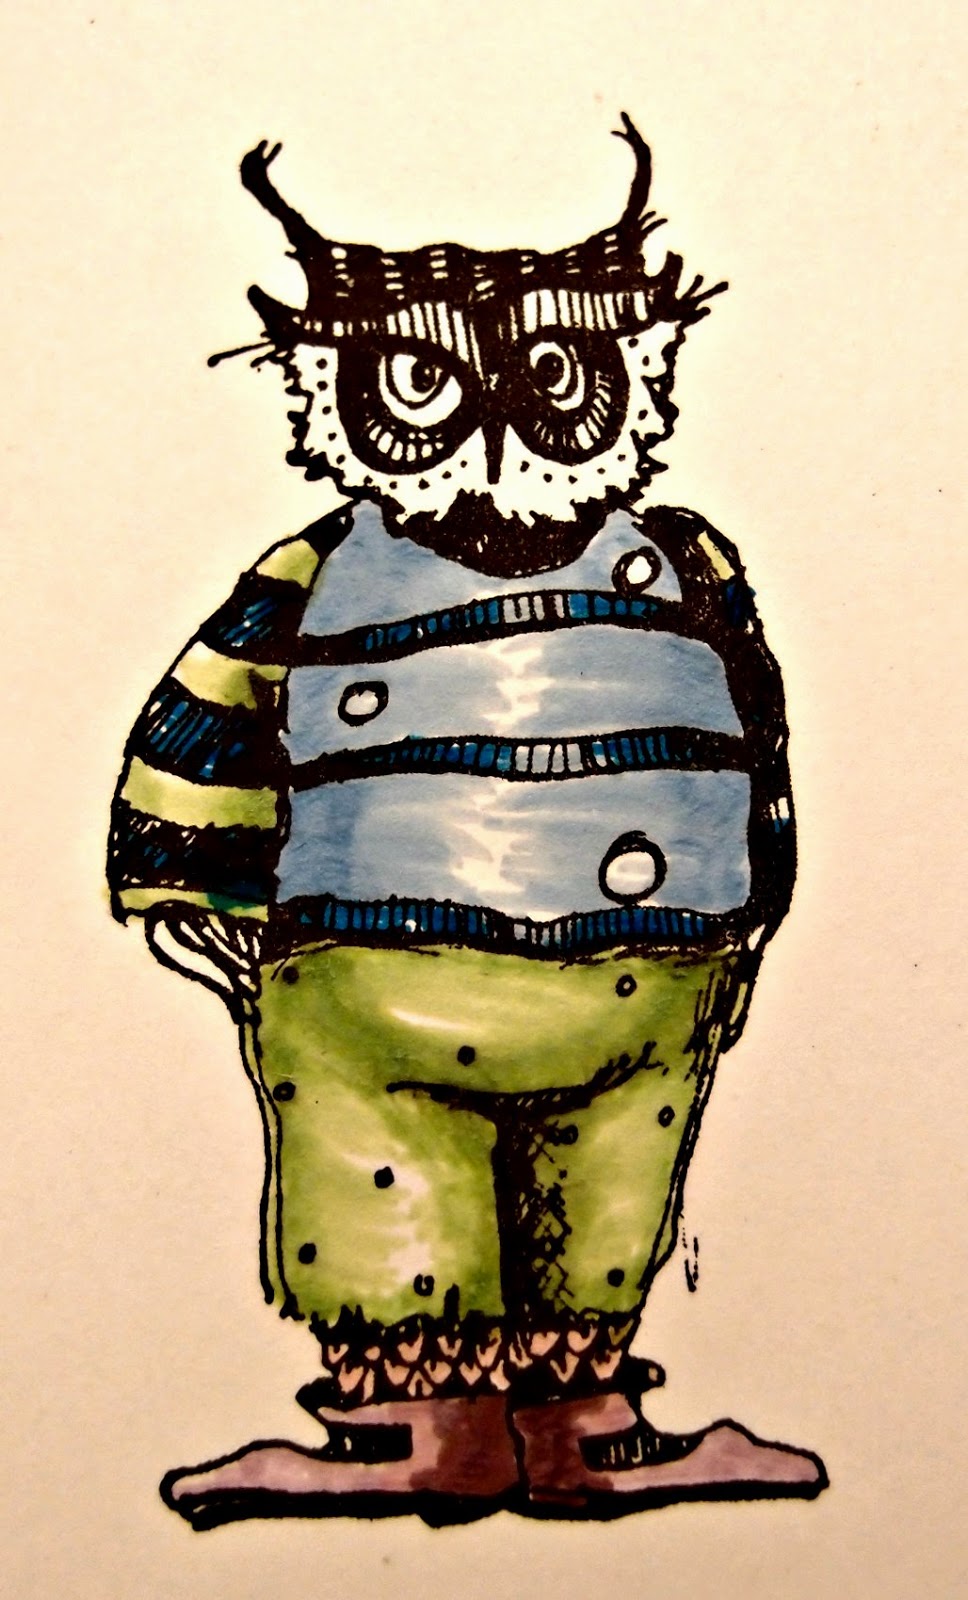
This time I picked up this unmounted sheet. Plate 1436 
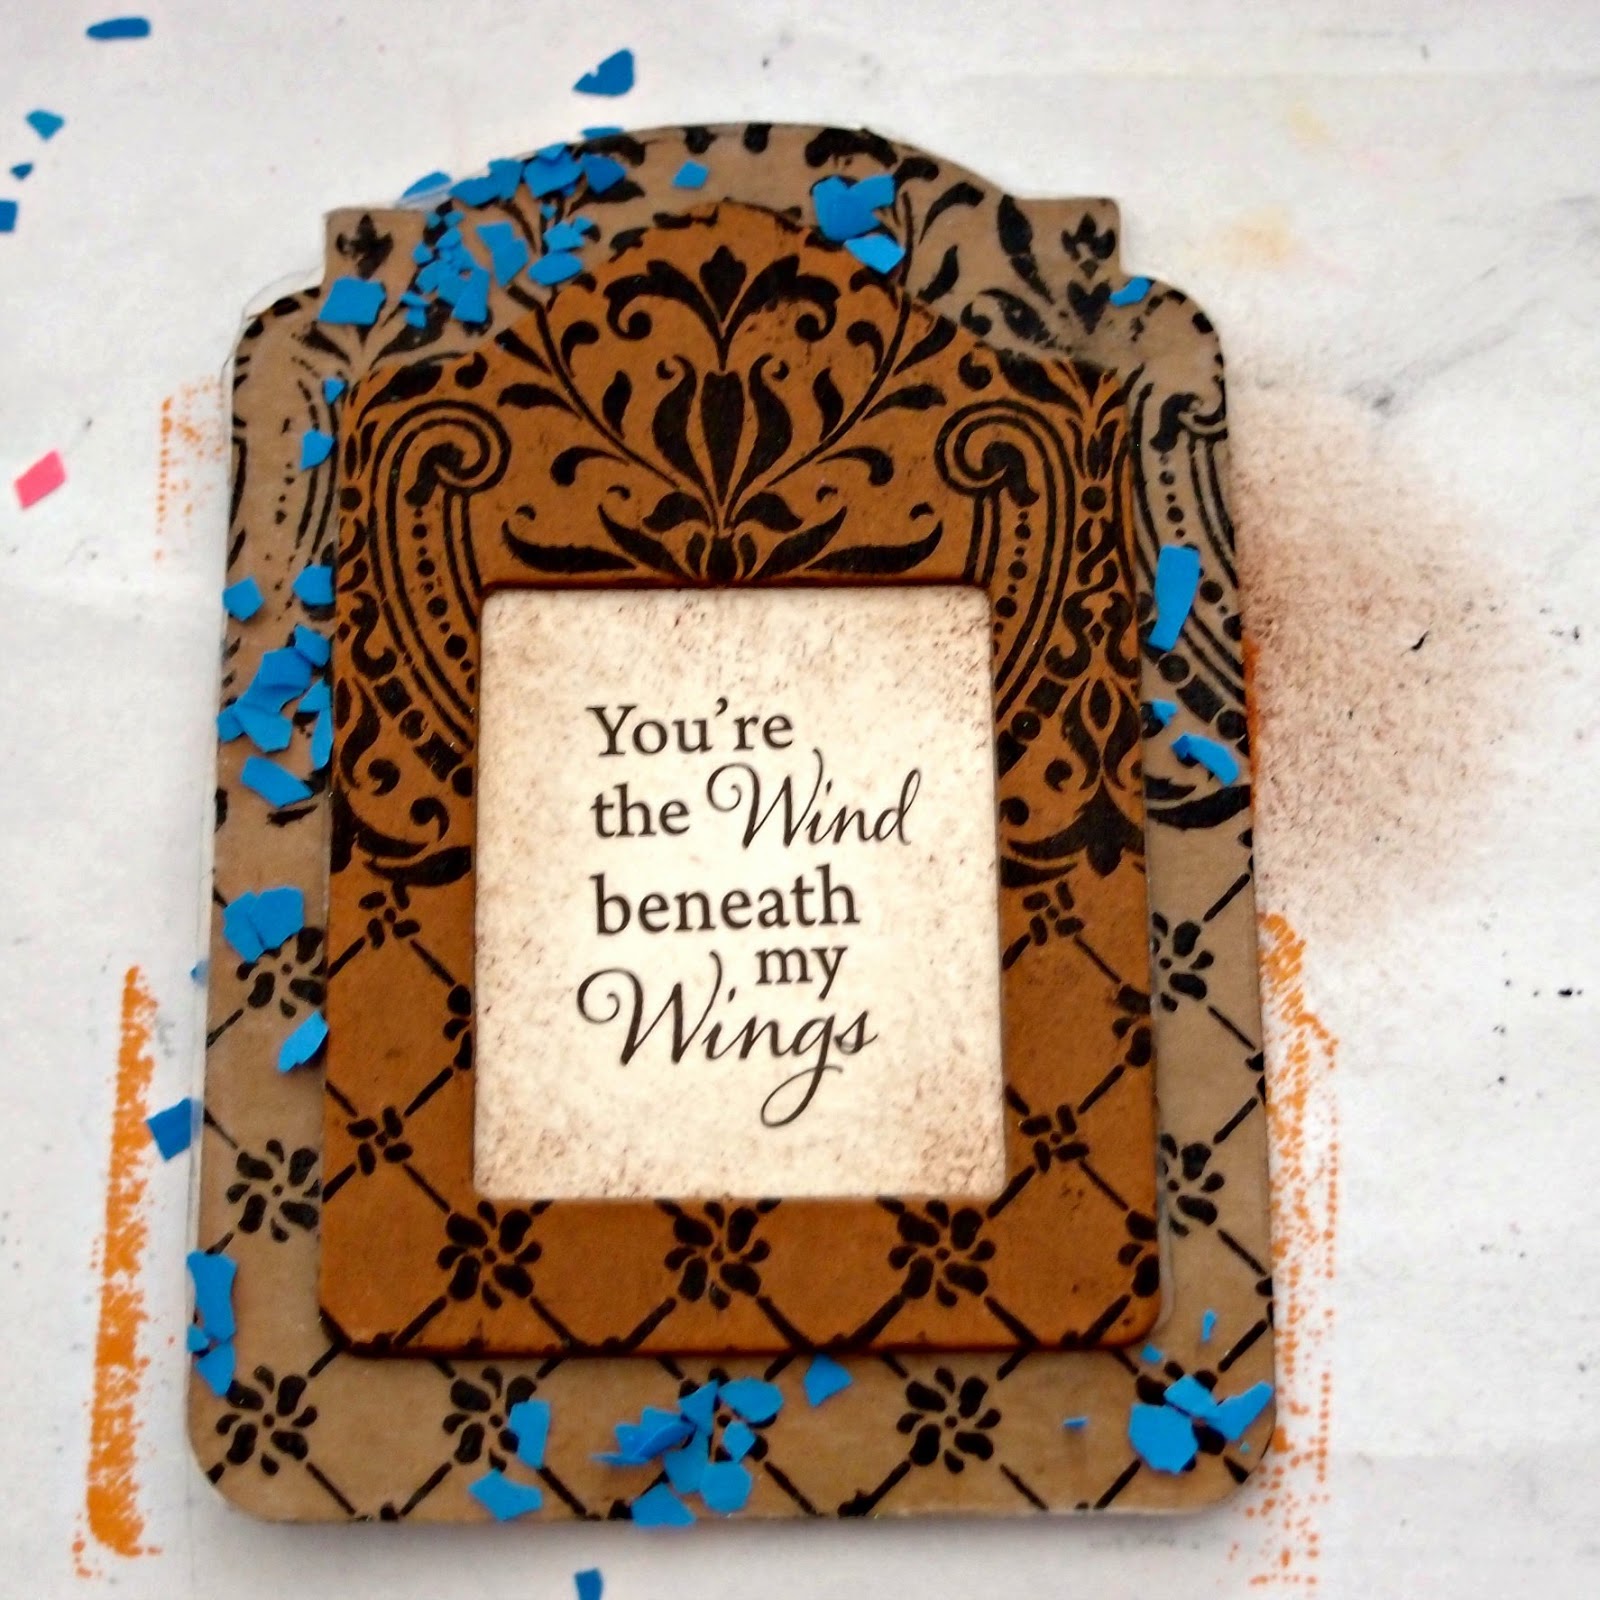
and made this collage.


Supplies

VivaLasVegaStamps! plate #1436

Imagine Crafts/Tsukineko
StazOn Midi - Midnight Blue, Blue Hawaii, Cactus Green, Jet Black
Memento Ink - Love Letters
Memento Markers 
Pico Embelissher - Tuxedo Black
Jumbo Dauber
Brushstix
Ink Blushers

Crafter's Workshop stencils

White card stock
glue


How To

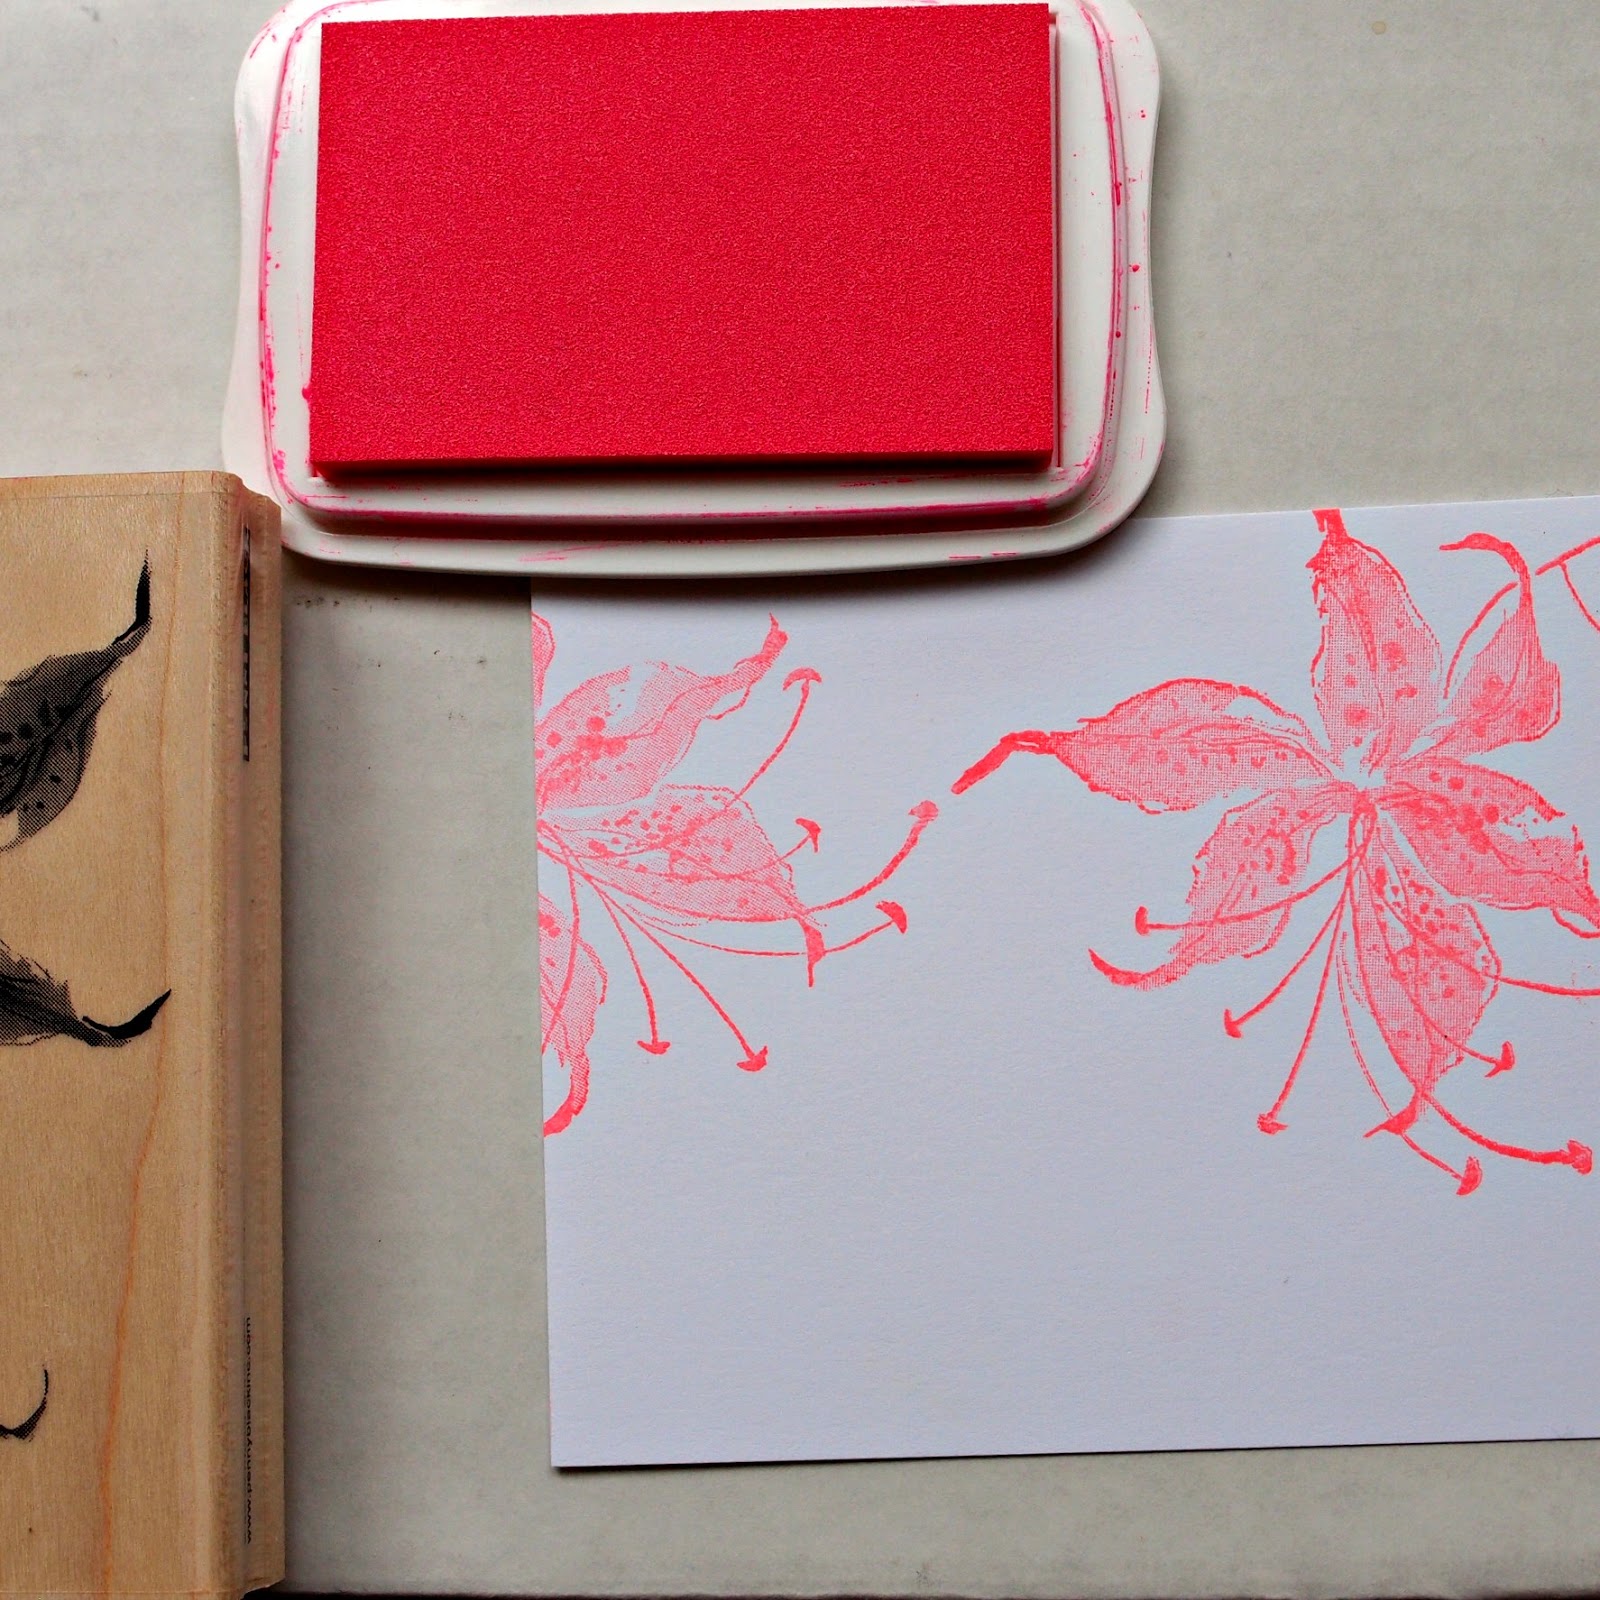
On Cardstock (I used 8.5 x 11) stencil background with StazOn inks 

Add Blue Hawaii and Midnight Blue as well using Ink Blushers

Background is ready


Stamp images on card stock with StazOn Jet Black


Color with Memento Markers. 
I used a lot of colors

Start with light colors then, add darker colors as shade
 

Cut out images, and some flowers from card stock, then arrange them on the background
Adhere images, apply Memento Luxe - Tuxedo Black with Brushstix
Color the flowers with Memento - Love Letters

Add stencils with Memento Luxe - Tuxedo Black here and there

on the flower too!
Add doodling with Pico Embellisher

Actually I filled leaves and more doodling after this picture,
When everything dried completely set it in the wooden frame.

that's it for today!

thank you for your visit!!


Tuesday, May 20, 2014

Stampendous Blog Hop

Stampendous and Imagine Crafts Header


 Welcome to a week of fantastic collaboration between IMAGINE Crafts and Stampendous! We have to admit that our two companies were made for each other and we're proud to have shared a long relationship of working together.  After all, what are stamps with out ink?  The projects created by our artists this week feature IMAGINE Crafts Radiant Neon™ inks paired perfectly with coordinating colors of Fran•táge Color Fragments from Stampendous, along with some of their newest stamp designs and Stack Art kits.

Prizes galore for participating in the Blog Hop this week!

We'll be giving three prize packages of 3 Radiant Neon inks and 3 Fran•táge Color Fragments (we'll choose your colors). There will be a bright crafting future ahead of you! Each day we’ll post that day's participating artists.  Visit their blog and leave a comment by midnight PST May 25th.  We ‘ll randomly select three different blogs from the five days, then randomly draw one commenter from each blog. You must have a U.S. mailing address to win, but we’d love for everyone to hop and comment! You can check out the Official Rules for all our contests if you have questions.

STM Imagine Crafts Prize Package

So are you ready for some exciting inspiration?

Here's who is hopping today:

Kazuko Kocho (you are here)

Jamie Martin

Maureen Cronin

Krissy Fossmeyer

Sylvia Blum

Tenia Nelson

Cathy Andronicou

To visit a list of the previous posts that are part of this Blog Hop,

please visit the IMAGINE Crafts Blog to find those links.

***Blog Hop Hint – if you click on a link that takes you to a page saying something like, “Sorry this page cannot be found,” just click on the header at the top of the blog (usually a picture, or the blog’s name), and it will take you to that blog’s most recent post. That post *should* be our hop. If not, you can probably scroll down a short way to find the hop post.

***********************************************

Thank you for stopping here, I'm so excited to be in Stampendous Blog Hop!

I feel so lucky to try Stampendous's  new products called STACK ARTS which has 4 sets of lazer cut chipboard, adhesive sheet and printing on the heavy card stock, besides matching stamp set are available. 

Here's what I made


SUPPLIES

STAMPENDOUS

IMAGINE CRAFTS/TSUKINEKO
STAZON MIDI - ORANGE ZEST
BRILLIANCE - GRAPHITE BLACK
STAZON MIDI - SPICED CHAI
GOOSEBUMPS 

Flat Beads (unknown)


HOW TO


DTP StazOn Orange Zest to the frame

Stamp background with Brilliance Graphite Black.  Let dry.

Stamp the same background with Brilliance Graphite Black on the base panel

Cut out phrase, sponge StazOn Spiced Chai.

Apply Glue sheet on the back of frame, then adhere phrase piece.

Apply glue sheet on top of base panel, then adhere prepared frame.

Sprinkle the Blue Fragment here and there.

Apply Orange Flocks (Stack Art Element Kit) to rest of base panel.  Stipple brush helps applying flocks evenly and firmly.

Apply Goosebumps to the frame

While the Goosebumps wet, arrange flat beads.  Let dry. That's It!


Hope you enjoy the project as I did.  Playing with Stack Art things are so much fun!! I still have more supplies, want to try different combinations of colors and textures!


Friday, April 4, 2014

Radiant Neon Blog Hop


CardMaker Magazine

Above is the starting point of this blog hopping!
******************

Thank you so much for stopping by .
I'm so honored and excited to be contributed in Radiant Neon Blog Hop today.


Have you ever seen these new ink?  or already played with?
They are happy colors, and happy colors make me happy!!
Colors are so rich, embossable, blendable on both light or dark papers.
I've been using them for stamping, stenciling and making background.


Here's my Happy Birthday card with Radiant NEON


SUPPLIES

  •  Radiant Neon "Electric Pink" & "Electric Yellow"
  •  Sponge Dauber

  •  Stamp - Penny black
  •  Die - Penny Black
  •  Card stock - white , orange, yellow
  •  glue
  •  rhinestones


HOW TO

Stamp flower image randamly with Radiant Neon Electric Pink

Sponge center of the flowers with Radiant Neon Electric Yellow

Die cut word from stamped panel. Keep these little ovals from "a""p" "B" & "d" 

Cut round 2 corners and glue to orange panel.  Fill in inside of "a" "p" "B" and "d".

Adhere to Yellow panel and folded white card. Add some rhinestones for finishing touch.

That's it!

You'll find how the ink colors are blended nicely, and detailed stamp image is showing.

I hope my card is inspiring yours.


------------------------------------------------------

Now it's time to hop to next artist


Enjoy her wonderful artwork there.


---------------------

Thank you for visiting :)


Thursday, December 26, 2013

AIR December 3 - Everyday card


For the last project for AIR, I decided to make encouraging card with these cute birds.  
This saying is touching my heart, giving me a smile.  It's a good way to closing year of 2013.


Supplies:
IMAGINE Crafts®/Tsukineko® StazOn® Solvent Inks in Jet Black
IMAGINE Crafts®/Tsukineko® Memento™ Dye Ink Markers

Stamps - Stampotique - 4027 Stack of Birds
                                     - 7319 Enjoy Today
Design Paper - Authentique Paper

How To

Stamp the birds with StazOn in Jet Black on coated Paper

Color with Memento Markers - start with lightest color to base coat, then adding colors 

For eyes, use Summer Sky as shades.

I used a lot of colors

Add shadow around and bottom with Summer sky for finishing touch

Add dots vine stamp with StazOn in Jet Black, then color with Memento Markers
Stamp the sentiment in same way, trim and layer on the folded card.


------------------------

It's been a great pleasure to be an Artist In Residence of Imagine Crafts/Tsukineko for 2 years.
Every assignments are challenging to me, as a result, gave me a great experiences.

My duty for AIR is over though, new AIR team for 2014 is forming, soon they start making great projects. Please look up Face Book and Blog  of Imagine Crafts/Tsukineko.

I'm keep on stamping, and sharing my projects here too, so please check my blog often.

Thank you John and Imagine Crafts/Tsukineko team!!


Tuesday, December 24, 2013

Merry Christmas

Hi all

It is beautiful day here in San Diego, perfect to celebrate joyful day.

Hope everyone has great holiday season ever.


Wednesday, December 11, 2013

AIR December 2 - Christmas Card


Hi All

My second AIR project this month is "Christmas Card".
When I see the holy branch stamp from Penny Black, I already knew what to do with it - so elegant, so sensitive.
It is kind a simple card so that good for making a lot of them.

Here we go!

Supplies
IMAGINE Crafts®/Tsukineko® Brilliance™ Pigment Ink 
  in Rocket Red Gold, Pearlscent Ivy, Pearlscent Crimson
IMAGINE Crafts®/Tsukineko® Jumbo Daubers™

Stamps - Penny Black
Design Paper - Penny Black
Ribbon - May Arts
Flatback pearls

How To:
Fold copy paper 4" wide to make straight mask. (my panel is 5" squares)

Insert 5" panel to the folded line so that only 1" from the edge will be shown.  Using Jumbo Dauber, apply Brilliance in Rocket Red Gold half way from the top.

Turn the panel 180 degrees, repeat the same procedure, but this time, color half way from the bottom.

Stamp holly branch with Brilliance in Pearl. Ivy

Stamp words with Brilliance in Pearl Criomson

Assemble panels to half folded card (6 x 6" in finish)

Add tiny flat back pearls as berries.  Apply bowed ribbon to the branch for finishing touch.

That's it!!

Thank you for visiting


Monday, December 9, 2013

AIR December - Christmas Box - Ruby Rock-it

Hi all!!

I just can't believe it's December already.. well, I've been saying the same thing every year.

Anyway, it's a Christmas season, and our mission this month is making goodie with Ruby Rock-It paper and embellishments.... so my project is Recycled shoebox.


Supplies:

IMAGINE Crafts® GlazOn™ Layer Protectant
IAMGINE Crafts® Mini Squeegee™
IMAGINE Crafts®/Tsukineko® Brilliance™ Pigment Ink
IMAGINE Crafts® Creative Medium™
IMAGINE Crafts®/Tsukineko® Sponge Daubers™


Red Card Stock
Spellbinders die
white glue

How to:


This is the shoe box I used.

Apply generous amount of Creative Medium with Mini Squeezee

Apply Design paper then add Creative Medium over the paper as sealer.

Keep on working covering the box surface

The box is covered all over

Add some borders and cutout with white glue

Punch out frame and panel,  color edges with Brilliance in Galaxy Gold
Die cut frame from red card stock, edge color with Brilliance in Lightening Black.

Apply GlazOn onto panel, spread out with finger. Let it dry.

Assemble panels over ribbon.


That's it.
thank you for visiting