Happy Thanksgiving for US buddy, happy harvesting time for other countries.
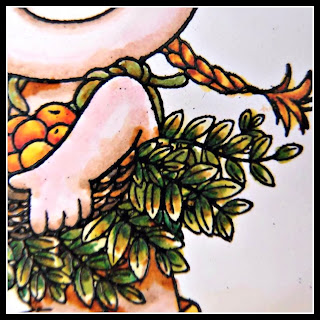
For this month's project, I picked Memento Marker coloring technique.
Unlike Copic or other brand of alcoholic ink markers, Memento Marker is water based yet fade resistant. So your artwork will last longer
I have a little trick to blending Memento Marker colors
- Use glossy paper - it will give me a longer time to blend colors on the paper.
- Use lightest color marker for base coat. Memento have nice light colors.
- Use tapping motion - like dots - to add shade, then blending with lighter color marker with same tapping motion.
In addition to above 3 tips, using black embossing powder will help the image crisper and make marker colors more vibrant.
SUPPLIES
- IMAGINE Crafts®/Tsukineko® VersaMark™ Watermark Ink
- IMAGINE Crafts®/Tsukineko® Embossing Powder in Black
- IMAGINE Crafts®/Tsukineko® Ink Potion No. 9™ Blending Solution
- IMAGINE Crafts Brushstix™
- IMAGINE Crafts®/Tsukineko® Memento™ Dye Ink MARKER in
Cantaloupe
Tangelo
Angel Pink
Love Letter
Morocco
Rhubarb Stalk
Desert Sand
Potter's Clay
Peanut Brittle
Toffee Crunch
New Sprout
Pear Tart
Bamboo Leaves
Cottage Ivy
Espresso Truffle
Summer Sky
Other supplies & Tools
Stamps - Crafters Companions
Printed paper - Graphic 45
Cutting Dies - Spellbinders
Paper flowers & Leaves
Flat back pearls
HOW TO
.
 |
| Stamp image with VersaMark and heat emboss with black embossing powder on glossy paper |
 |
| Color face - with Angel Pink, trace inside of face line, then blend in toward face center with Ink Portion No.9 using Brushstix. |
 |
| With Angel Pink, base coat other part of skin then use Desert Sand to give shades in tapping motion.. |
 |
| Blending 2 colors with Angel Pink in tapping motion. |
 |
| Add more shades with Potter's Clay. Blend colors same way as above. |
 |
| Color leaves with New Sprout. |
 |
| Shade with Pear Tart |
 |
| Add Bamboo Leaves |
 |
| Cottage Ivy for deepest shades |
 |
| For Hair, basecoat with Dandelion |
 |
| Shade with Cantaloup |
 |
| Add Tangelo for deeper shades |
 |
| For fruits, start with Dandelion, then, Cantaloup and Tangerin for shade |
 |
| For deeper shade, Rhubarb Stalk is added |
 |
| For Shoes, started with Cantaloup |
 |
| then Potter's Clay for shade |
 |
| Blending withe Cantaloupe |
 |
| For basket, start with Desert Sand |
 |
| Add Peanut Brittle |
 |
| And Toffee Crunch for deepest shade |
 |
| For shoulder ties, Bamboo Leaves is used for base coat |
 |
| Peanut Brittle for shade, also added to some leaves |
 |
| Use Toffee Crunch for here and there for deeper shades |
 |
| Cheeks are started with tiny dots of Love Letter |


